Bublup Rolls have always been beautiful, but we knew they had the potential to be so much more. You asked for advanced editing features, and we listened. With our two newest editing options, you can easily take your Roll aesthetics to the next level. We’re talking about customizable fonts and colors to perfectly match your brand or just your creative imagination! Read on to discover what’s new and how you can implement these changes ASAP.
Letter perfect Rolls!
We would make a font joke but we’re not bold enough…
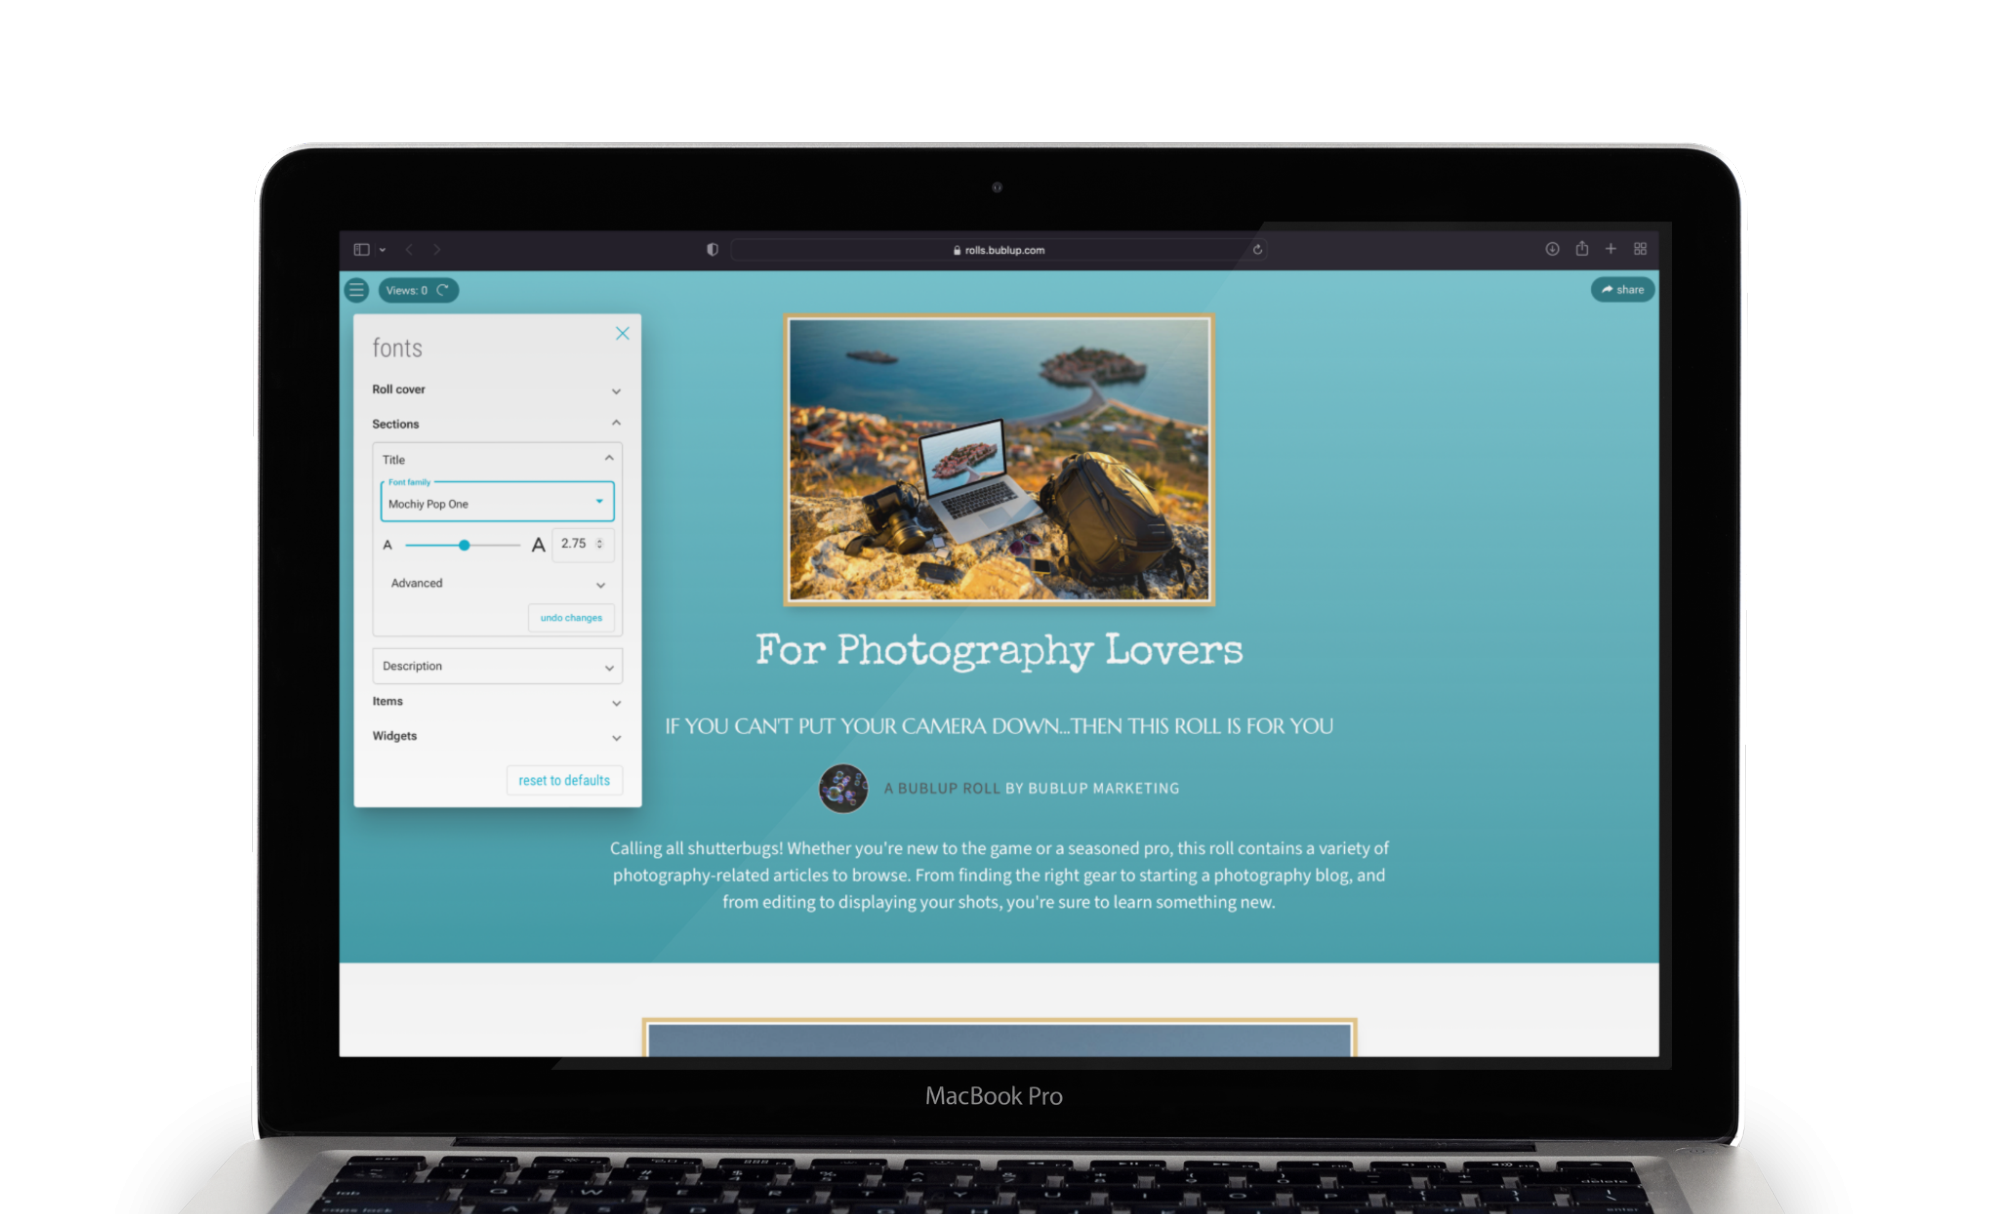
Hehe, get it? The truth is, when we created the ability to customize Roll fonts we took it very seriously. Not only can you edit the fonts in your Roll’s cover, sections, items, and widgets, but you can also adjust their thickness, width, and spacing.
To edit your Roll’s fonts, all you have to do is enter edit mode and select “Fonts” from the menu. You will then be prompted to choose which fonts to edit: Roll cover, Sections, Items, or Widgets.

Note: Premium Users have access to a wider list of font options.
Once you’ve selected the perfect font, you can explore the “Advanced” options for further customization. Your options include:
-
- Font weight (thickness)
- Font width
- Vertical spacing (distance between rows)
- Horizontal spacing (space between letters)
Talk about precision! Remember that no change is final, and there is an option to “undo changes”. However, when you undo changes, it only affects the most recent change. If you’d like to start over from scratch and reset your Roll to its original settings, choose “reset to defaults”.
Let your colors shine!

We’re clearly into colors, so it should be no surprise that this new feature has us over the moon. Our themes still have color palettes to choose from, but now every color in a Roll can be customized. With this update, you can create Rolls that are perfectly on-brand or just colorfully curated with a few clicks.
As always, enter edit mode to make changes by selecting the pencil icon in the upper left corner. Edit in “Live Mode” if you want your changes to appear instantaneously, or “Draft Mode” to publish the changes when you’re finished.
You’ll see the new option, “colors”, in the menu. Select this and choose one of the existing palettes. A box will appear displaying the set of colors this particular palette uses. Clicking on a color will bring up the color details, including:
-
-
- The color
- A second color used for contrast
- A description of what parts of the Roll are affected by this color pair.
-

Clicking on the left-hand color will bring you to the color selector. As you sample different colors, they will be changed and reflected in the Roll immediately. That said, keep in mind you may not necessarily be viewing a place in your Roll where this color is being used. Clicking “apply” will save your changes, and you can then scroll through the whole Roll to make sure you’re happy with the chosen colors.
In addition to the default color palettes, you can create one custom palette per Roll theme.
Note: You can always switch back to one of the Roll’s original palettes.
There you have it! Two advanced customization options that are sure to help your Roll get the makeover it deserves.
What else is on your Rolls wishlist? Feel free to drop us a line at support@bublup.com.


